WebSockets are a ubiquitous tool for building real-time experiences for users. They provide a persistent, bidirectional connection between a client and a server. For example, say the frontend of your app needs to stay up-to-date within seconds of your backend to do things like deliver notifications, status updates, etc. You may have implemented this as a periodic check, or poll, of the backend via some API like REST or GraphQL. Now that you have more users, and/or your processes have become more complex, these requests can start to weigh on your infrastructure capacity. That’s a problem that WebSockets can help solve.
Laravel and its ecosystem play a significant role in our stack at Knack, and recently we embarked on a new WebSocket server implementation which would work closely with our Laravel-based core API. For the uninitiated, Laravel is a popular PHP framework and ecosystem that provides a rich set of tools and features for building modern web applications. We decided to use the swooletw/laravel-swoole library to build our server-side implementation of a custom subprotocol and I had the opportunity to document some of my experiences along the way. I’ll show how to get started with the library, provide some background information, some caveats to consider, and drop a few tips. Let’s get started!
WebSocket Server Solutions for Laravel
First, we are working with the assumption that you want, or need, to host your own WebSocket server, and that you want to do so in PHP. With a stateful protocol like WebSockets we need to be able to run PHP concurrently. There are basically two different approaches: language-level and extension-level.
Language-level libraries and frameworks implement concurrency in pure PHP. Examples include AMPHP and ReactPHP. In contrast, extensions are written in a lower-level language, typically C/C++, and expose APIs at the PHP-level to access the extension-level functionality. Swoole and OpenSwoole are examples of PHP extensions. In short, Swoole is an event-driven, asynchronous, multithreaded framework that makes it easy to build performant, concurrent servers.
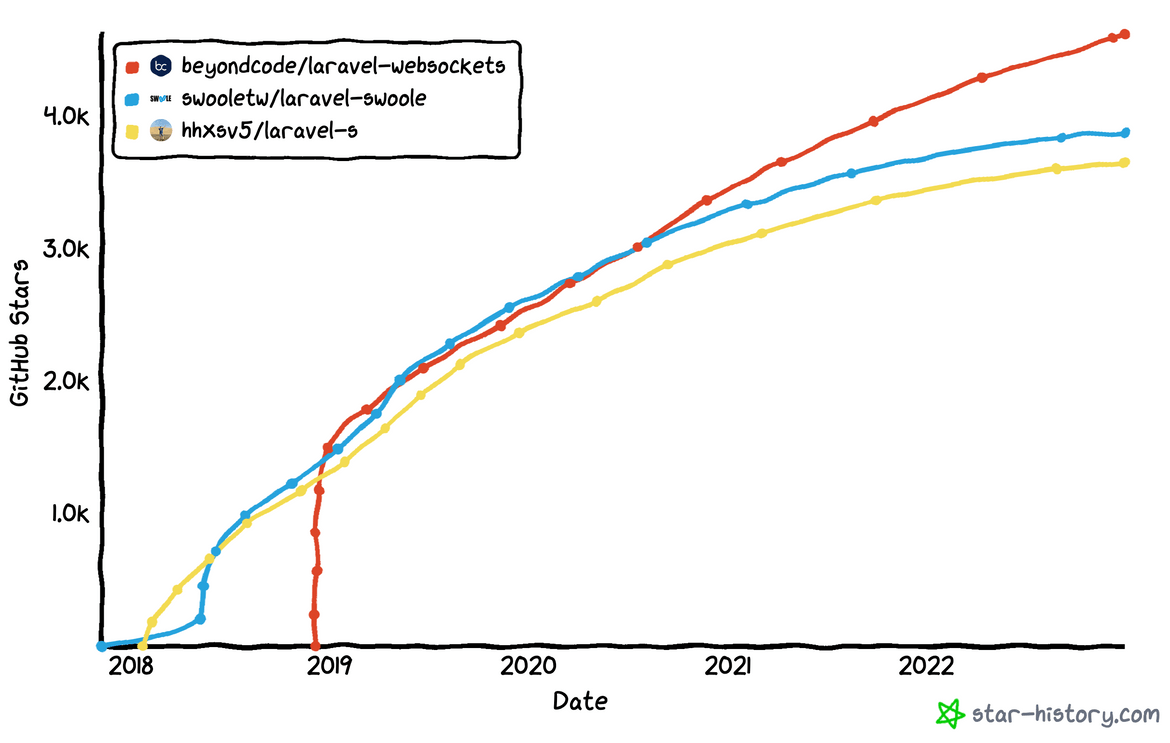
Now let’s evaluate pre-packaged WebSocket Server solutions that easily plug into a Laravel app. On the language-level side we have the seemingly most popular choice: the beyondcode/laravel-websockets, a package by Beyond Code. It is built on Ratchet (which is built on ReactPHP), has a Pusher protocol implementation, and plugs well into the Laravel framework’s broadcasting API. While this supports a lot of use cases and does so in a familiar “Laravel way” it is not very flexible when you need something like a custom subprotocol implementation, and it is inherently limited in performance due to being built on a PHP server core rather than a C/C++ one.
On the extension-level side we have two libraries that are built around Swoole: swooletw/laravel-swoole and hhsxv5/laravel-s. They are both established packages with a wide contributor base, but my colleagues and I ultimately concluded that the sandbox and safety features within laravel-swoole were a bit more mature and reliable in our testing.
There are a few blog posts out there on getting started with laravel-s but not as many for laravel-swoole, so I felt particularly motivated to write and publish this article. The laravel-swoole default WebSocket implementation is built with Socket.io in mind, where laravel-s is a bit more agnostic in its implementation. Both packages have some feature overlap but some differences as well. I would consider both of them for your project and evaluate the best fit!
Getting started with swooletw/laravel-swoole
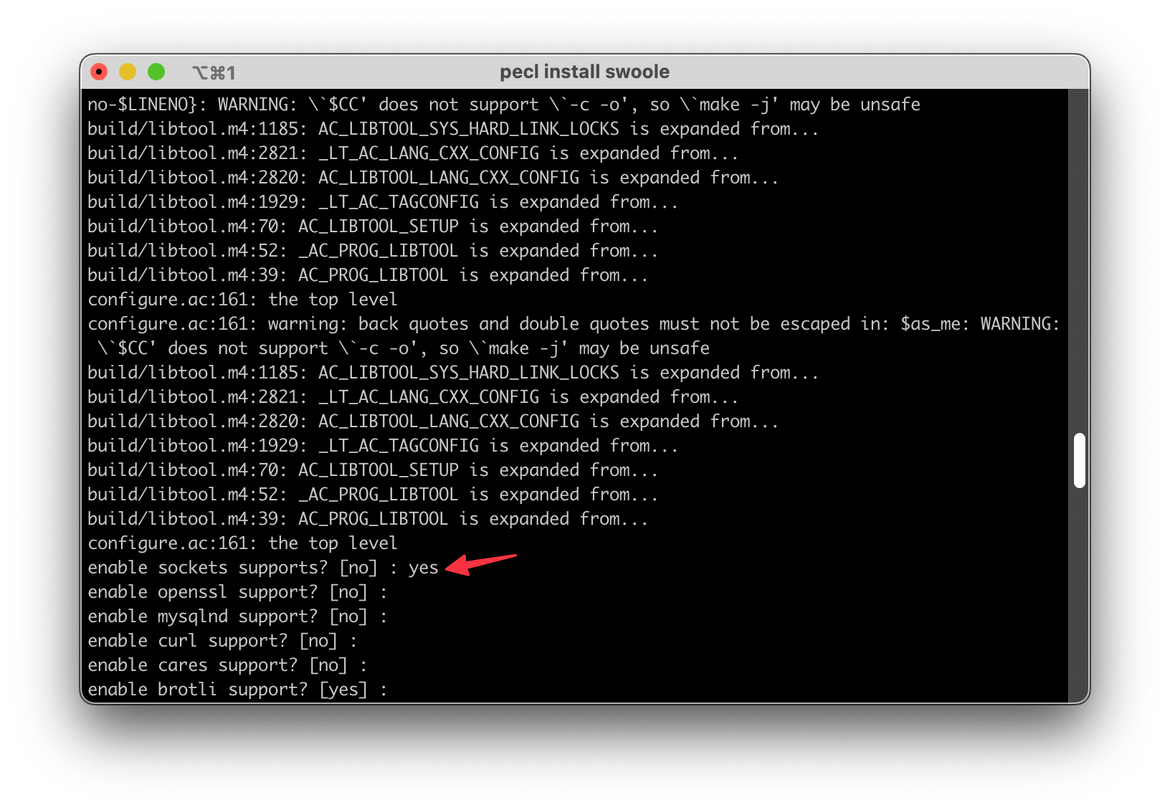
First, let’s install either Swoole or OpenSwoole. I’ll be using Swoole for this example. Be sure to enable support for WebSockets on installation when prompted like so:
pecl install swooleIf you run into any issues during the Swoole build process I included a few troubleshooting steps in the appendix.
Now, create a new Laravel app. Continue bootstrapping the app using Laravel Jetstream. I used the Intertia template, but I believe the API feature should work with Livewire as well.
laravel new
composer require laravel/jetstream
php artisan jetstream:install inertia
Let’s set up that feature: just enable it by uncommenting the line in config/jetstream.php:
'features' => [
    ...
    Features::api(),
    ...
],
Next, require the laravel-swoole package and publish its config files:
composer require swooletw/laravel-swoole
php artisan vendor:publish --tag=laravel-swoole
Here we’ll also want to adjust the config to enable the WebSocket server by default.
'websocket' => [
    'enabled' => env('SWOOLE_HTTP_WEBSOCKET', true),
],
Now, for this basic example we’ll just have our handlers defined inline as closures in the websockets “routes” definition. For anything that is more than a simple exploration I would recommend creating controllers or Laravel Actions to store the handler code.
<?php

declare(strict_types=1);

use App\Models\User;
use Laravel\Sanctum\PersonalAccessToken;
use SwooleTW\Http\Websocket\Facades\Websocket;

Websocket::on('whoami', function (SwooleTW\Http\Websocket\Websocket $websocket) {
    $websocket->emit(
        'message',
        $websocket->getUserId() === null
            ? 'You are not authenticated'
            : "Your userID is {$websocket->getUserId()}"
    );
});

Websocket::on('login', function (SwooleTW\Http\Websocket\Websocket $websocket, mixed $data) {
    if (is_string($data)) {
        $tokenInstance = PersonalAccessToken::findToken($data);

        if (
            $tokenInstance instanceof PersonalAccessToken &&
            $tokenInstance->tokenable instanceof User
        ) {
            $websocket->loginUsing($tokenInstance->tokenable);
            $websocket->emit('message', $tokenInstance);
        }
    }
});
Now we can test it out! Let’s start the Swoole server and test things out.
Note: You will need to disable Xdebug before you can run any Swoole code. If you skip this step your terminal will be overwhelmed with warning logs when you run this next command and things might not behave properly. If you expect to be doing a lot of Swoole development then you may want to configure a tool or script to enable or disable loading the Xdebug extension. For macOS there’s an open source tool to add a toggle button in the menu bar called xDebugToggler.
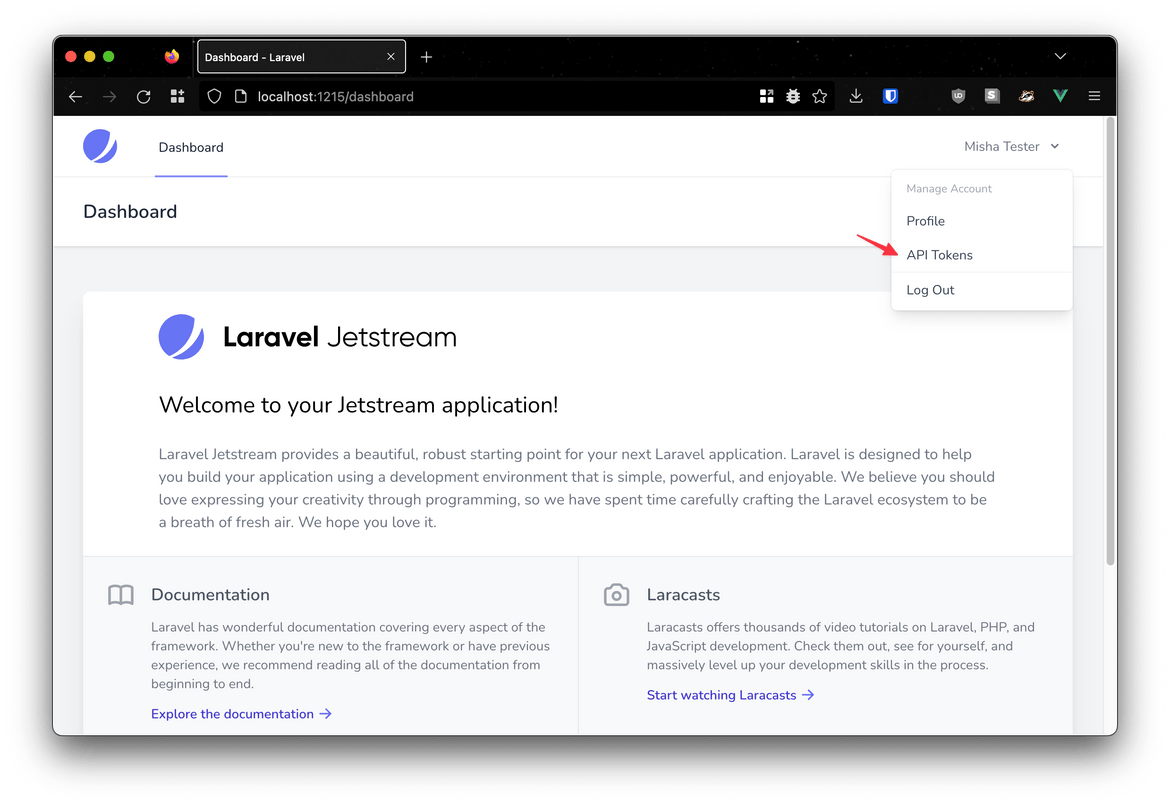
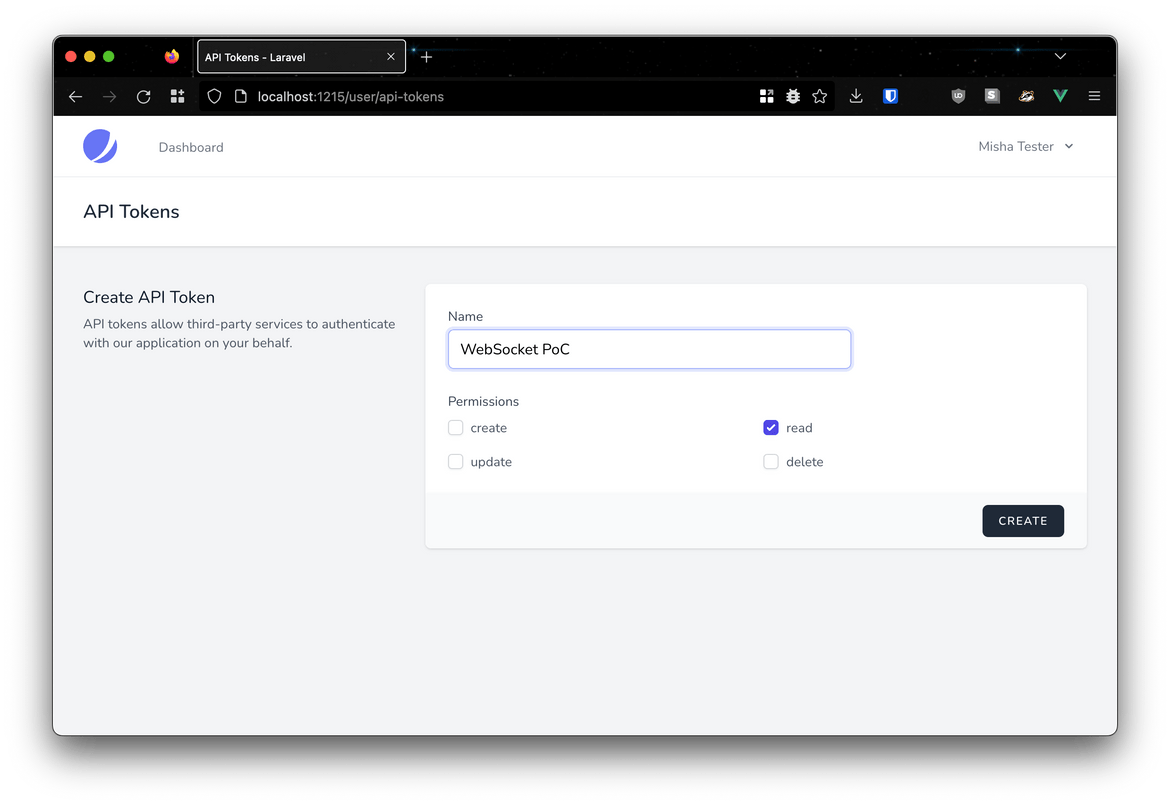
php artisan swoole:http startTry navigating to http://127.0.0.1:1215 and seeing if you are able to register and login just like if you were to run php artisan serve. From there, head to the API Tokens section:
Create a token and save it for the next step.
Now, let’s connect to the server via WebSocket and test our handlers! Open up your WebSocket client of choice. I’ll be using Postman here.
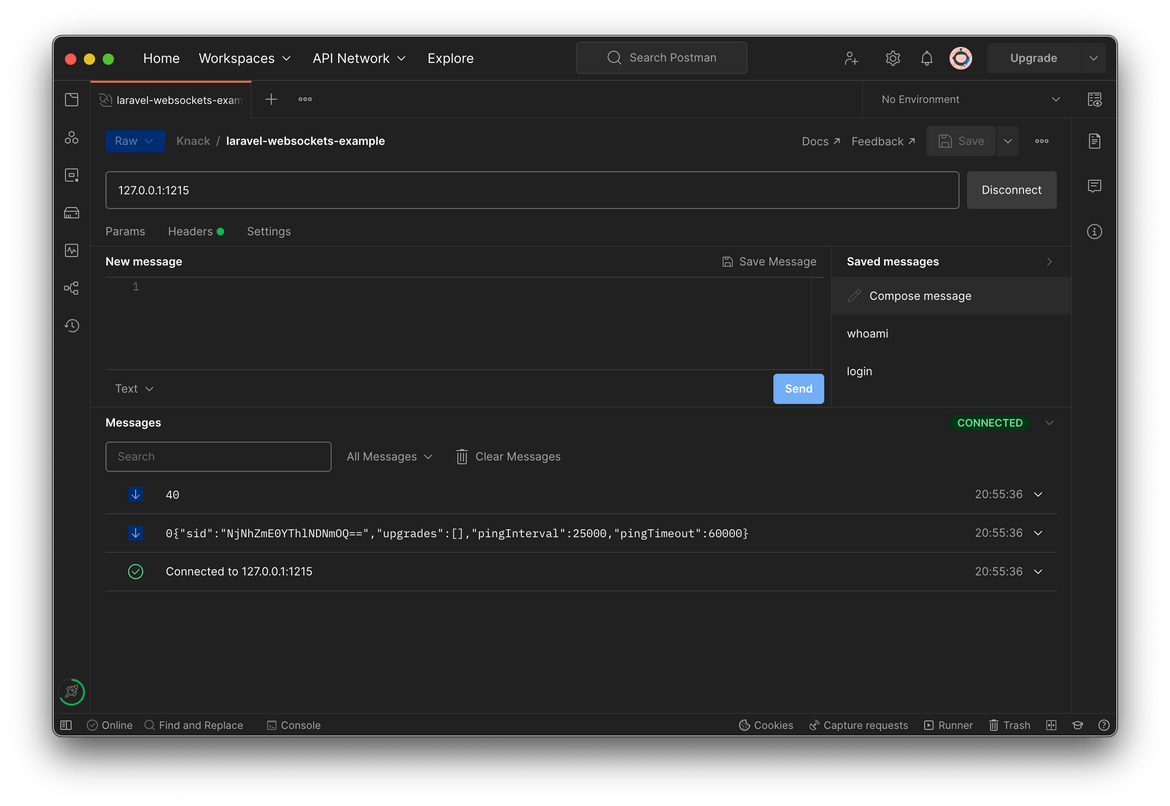
Let’s get connected and make sure everything works. Enter your hostname and port (likely 127.0.0.1:1215) and hit connect. You should see two messages come through and the status should still read CONNECTED.
If you’re wondering what those 1-2 digit numbers prefixing the server messages are, those are Socket.io packet type encodings. You can remove these and adjust anything about frame parsing by creating your own implementation of \SwooleTW\Http\Websocket\Parser.
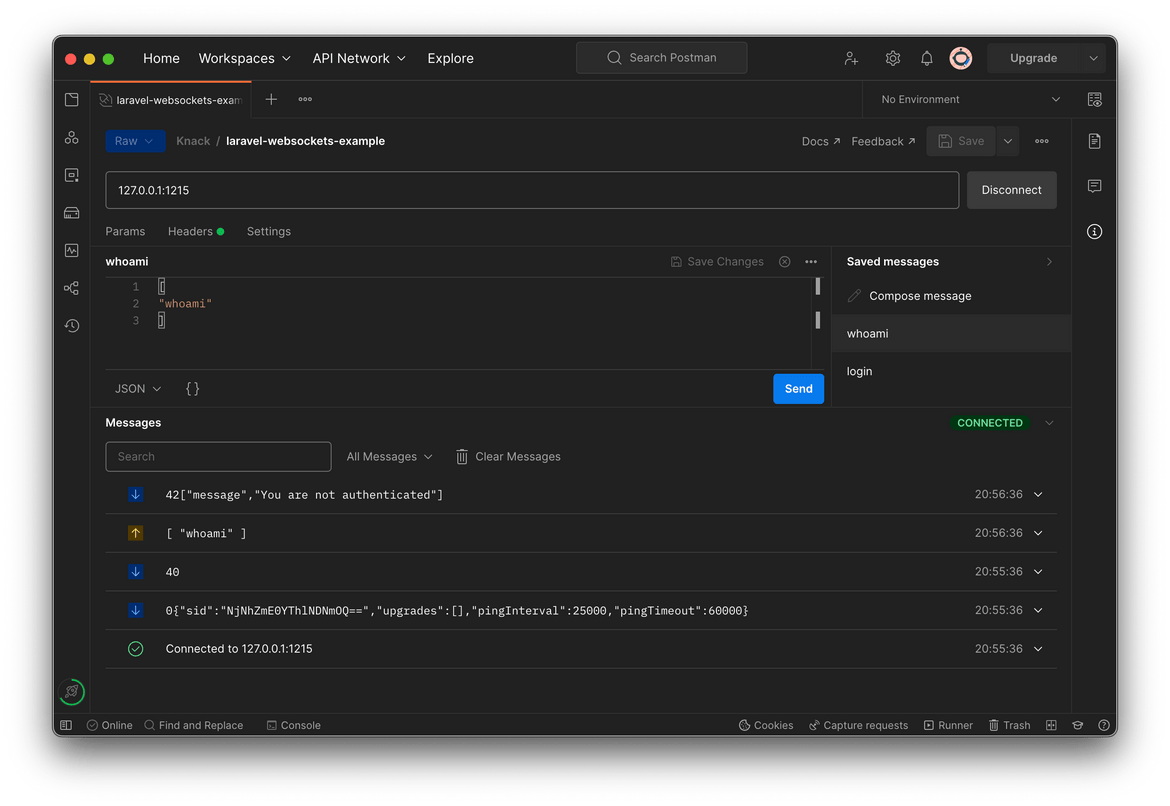
Let’s send a whoami payload using this JSON:
[
  "whoami"
]
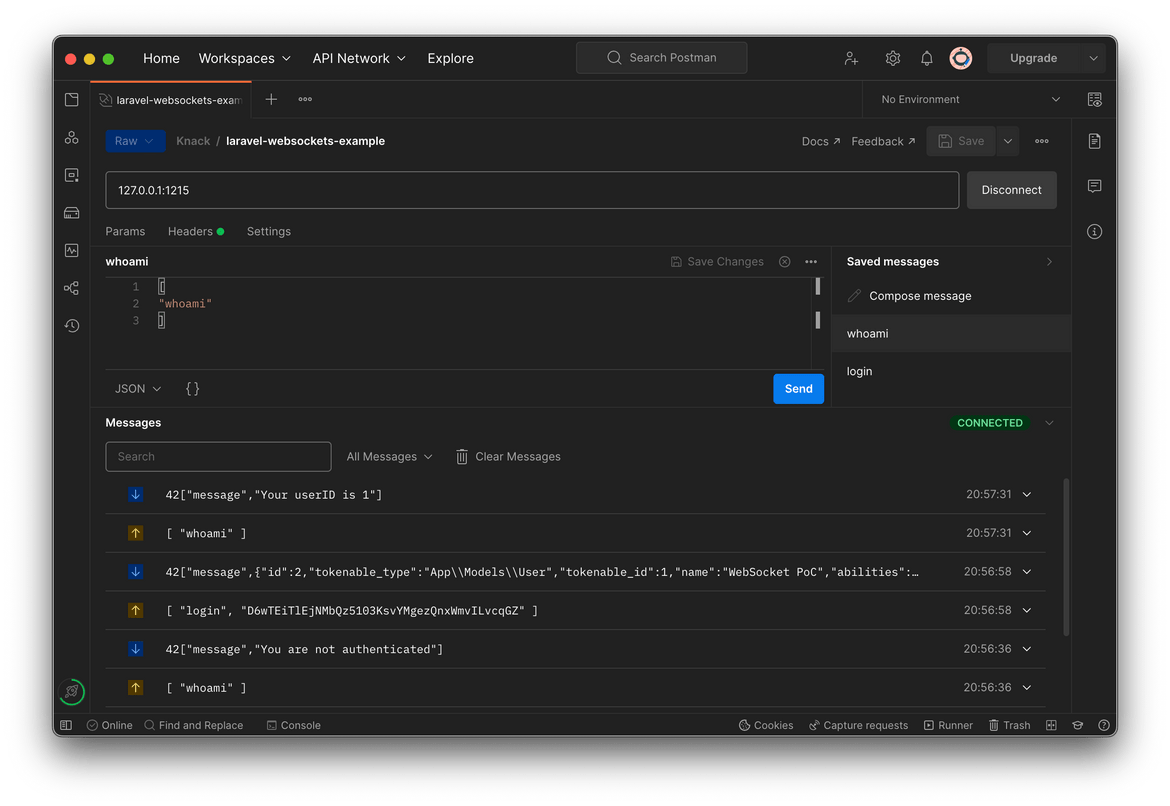
As expected we get the unauthenticated message. So let’s log in! Refer to the following JSON payload:
[
  "login",
  "YOUR_API_TOKEN"
]
And we get the $tokenInstance we emitted in our routes/websocket.php handler for login, and the default parser was nice enough to JSON-encode it for us! We can send another whoami to check our work:
We now have a WebSocket server and a way to authenticate connections! This example is very basic, but I hope it gives a background to build something great with.
Appendix
Notes on using Swoole and laravel-swoole
Try Using Swoole (or RoadRunner) to serve your app
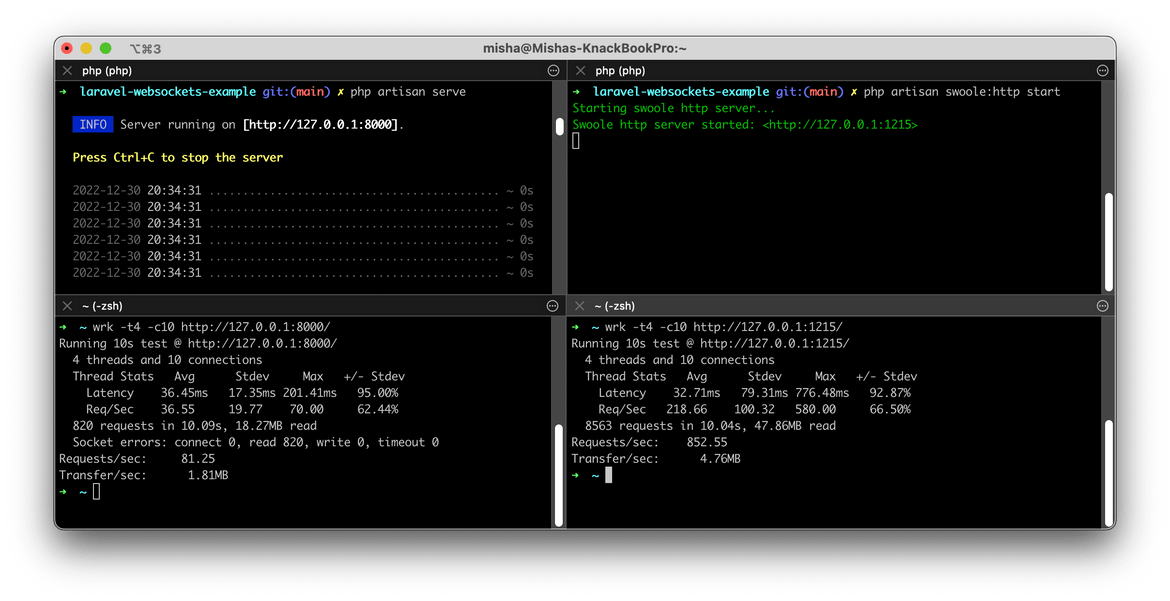
If you end up using a Swoole-based solution for your WebSocket server, why not serve HTTP requests using Swoole as well? Laravel’s request lifecycle by default is actually pretty redundant: for each incoming request that your Laravel app handles it needs to be fully bootstrapped every time: framework, service providers and all. There is a first-party solution to this: Laravel Octane, which uses your choice of Swoole (or OpenSwoole) or RoadRunner to provide a relatively easy way to serve many more requests by booting and loading the application into memory. Laravel Octane with RoadRunner is very likely to be a drop-in replacement for Nginx/PHP FPM for your Laravel app if you’d rather not add Swoole to your stack. Either way, it could be an easy win to dramatically increase your throughput for typical HTTP server needs using Laravel Octane, laravel-swoole, laravel-s, or another similar solution.
Choosing a WebSocket Room Driver
Be sure to choose your room driver, which associates WebSocket connections with users as well as membership in channels, appropriately for your use case. By default, the library will use a Swoole table to store these records. Swoole tables are an incredibly performant data store compared to Redis, as Cerwyn Cahyono concluded in May 2021. One consideration however is horizontal scaling: if you have more than one WebSocket server behind a load balancer, for instance, you need to consider that Swoole tables are only accessible by the Swoole server process and its forks.
If you need to have a common record among all of your WebSocket server instances with laravel-swoole then you may want to consider the provided Redis driver (\SwooleTW\Http\Websocket\Rooms\RedisRoom), or creating your own implementation. Be sure to add a prefix unique to the server for all records, that way you don’t end up sending a message intended for one WebSocket connection on Server A to another, unrelated WebSocket connection on Server B.
Implementing middleware for WebSocket frames/messages
You may also find that you’d like to have middleware for all incoming WebSocket messages. If all you need to do is interact with parts of the Frame then you can add this handling in a custom handler or parser. These are defined in config/swoole_websocket.php. If you need to get the user ID and interact with a WebSocket instead then you’ll have to override and extend the \SwooleTW\Http\Concerns\InteractsWithWebsocket trait to directly modify the Swoole onMessage handler.
Adding Swoole to an existing stack/system
If you have a system where a Swoole WebSocket server stands alongside other pieces like an HTTP server, queue worker, etc. then you will need to implement some kind of global pub/sub infrastructure that coordinates between the Swoole WebSocket server and everything else. Redis is one way to fill that need. You could have an async Redis client boot with the Swoole server and SUBSCRIBE to a given channel. The client could listen for a JSON payload which could simply have a user ID and data to emit to the authenticated WebSocket connection. That way, you could issue WebSocket messages from non-Swoole contexts by simply PUBLISHing the JSON payload to the corresponding channel. This does have the added overhead of having to establish a Redis connection for each emit from a non-Swoole context, but you get the flexibility of cooperating well with your existing system.
Troubleshooting installation of Swoole extension
When installing the Swoole extension on both ARM64 and x64 macOS machines I’ve run into a few issues and wanted to share how I resolved them.
fatal error: ‘pcre2.h’ file not found
If you get this error when installing Swoole then you need to be sure you have pcre2 installed. On macOS, you can do this using Brew:
brew install pcre2Then you can use the Brew CLI to grep the location of the pcre2.h file and link it under your current PHP version’s include/php/ext/pcre/ directory.
brew list pcre2 | grep 'pcre2\.h$'

ln -s /opt/homebrew/Cellar/pcre2/xx.yy/include/pcre2.h /opt/homebrew/Cellar/php@x.y/x.y.z/include/php/ext/pcre/pcre2.h
fatal error: ‘openssl/ssl.h’ file not found
This guide doesn’t require building Swoole with OpenSSL support, but if you do you may need to set your OpenSSL directory during the build config. You can do so by first ensuring that you have OpenSSL installed locally, on macOS you can also do this using Brew:
brew install opensslThen you can once again use the Brew CLI to get your OpenSSL directory and pass it in during the extension build configuration, right after executing pecl install. When prompted to enable OpenSSL support, type out “yes” and then add the --with-openssl-dir flag inline like so:
brew --prefix openssl
pecl install swoole


enable openssl support? [no] : yes --with-openssl-dir=/opt/homebrew/opt/openssl@3
Notes on WebSockets
Subprotocol gotcha
Be sure to pay attention to the Sec-WebSocket-Protocol HTTP header on the initial connection request. If the client request specifies a protocol in the header and the server doesn’t respond with that protocol, or any, then some browsers like Chrome will just drop the connection, which technically follows the WebSocket spec more closely, and others like Firefox and Safari will connect without hesitation.
Which WebSocket dev client to use?
For me this has been Firecamp, but I have gotten frustrated with the bugs and poor performance of the app. It has a lot of potential, so I’m definitely going to keep watching it! Insomnia just added WebSocket support, but it is still immature and lacking features. As of Jan 2023 I recommend using Postman, though note that even for them WebSockets support is somewhat of a beta.
Give your WebSocket server a heart(beat)
Be sure to implement some kind of heartbeat function for persistent WebSocket connections. It’s a good general practice, and helps when you have or want infrastructure configurations that close inactive connections. With many subprotocols the heartbeat is client-initiated.
Authentication Patterns
There are many patterns for authenticating WebSocket connections, but can be categorized as either during the initial connection request (authentication-on-connection) or afterwards within the established connection (authentication-after-connection). During the initial connection request the two most common approaches are to either use a cookie, or a token in the header or body. Typically, with the authentication-on-connection approach the connection is closed by the server if the authentication check fails. With the authentication-after-connection approach typically servers have a timeout which closes connections that don’t authenticate within a given timeout. At Knack, we created a WebSocket backend that implemented the graphql-transport-ws subprotocol which frontend library enisdenjo/graphql-ws supports.
For reference, laravel-swoole is configured by default for authentication and other middleware to be run on the initial connection request. While this is a valid approach, my impression is that the dominant WebSocket authentication pattern is to support authentication-after-connection. For this guide I implemented an authentication-after-connection flow as a barebones custom subprotocol. Before proceeding with your project be sure to consider what kinds of clients will be connecting to your WebSocket server and choose your approach accordingly.
This article has been cross-posted on my personal blog
